
Summarize with
Most householders underestimate flooring demolition until they pull up the first plank and find three older floors stacked underneath it. At Demo Pros Plus, we’ve walked into plenty of jobs quoted as a simple one day tear out that turned into a two day project once someone found glued down vinyl over the original hardwood.
According to the EPA, the country generated roughly 600 million tons of construction and demolition debris in a single recent year, more than double the amount of household municipal waste. Floors are a bigger part of that number than most people assume.
Knowing what’s actually under your feet, and what removing it involves, changes how you budget and schedule a renovation.
What Is Flooring Demolition and When Is It Needed?
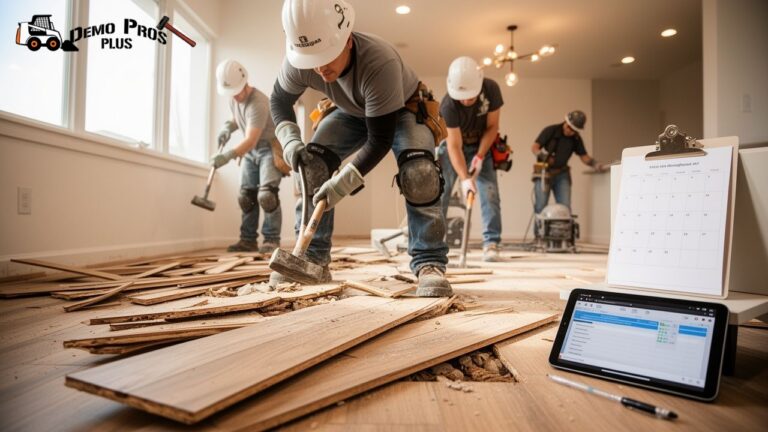
Flooring demolition is the removal of an existing floor covering, and often the layers beneath it, down to a surface ready for new material. That can mean pulling up carpet and pad in an afternoon, or grinding thinset off a concrete slab for two straight days. Scope depends entirely on what’s down and how it was installed.
This isn’t limited to full renovations. Water damage and a failed subfloor, or even a simple style update, can trigger the need for flooring demolition. If a floor is cupping, or a new floor keeps failing to bond to what’s underneath, the old material usually has to come out first.
Flooring Removal Before Renovation
Flooring Removal Before Renovation is one of the most overlooked line items in a remodeling budget. Contractors quoting a kitchen or bathroom job will price cabinets or counters and fixtures in detail then treat flooring demolition as an afterthought. That is a mistake because old flooring frequently hides problems that change the entire scope of a project.
We have opened up 1970s kitchens expecting plywood underneath the vinyl and instead found a layer of 9 inch asphalt tile from the original build.
Tile that size and era is presumed by OSHA to contain asbestos unless tested and proven otherwise and that single detail can add days and real cost to a renovation timeline.
Skipping this step or assuming the old floor will “just come up” is how projects go over budget in the first two weeks.
Types of Flooring Demolition
Not every floor comes up the same way, and pricing flooring demolition without knowing the material is guesswork. Here’s how the major categories break down:
- Hardwood Flooring: Nailed or stapled boards come up plank by plank with a pry bar and floor scraper. Glued down hardwood is slower, since adhesive has to be softened or ground off the subfloor.
- Tile Flooring: Ceramic and porcelain need a jackhammer or oscillating tool to break the mortar bond, and the thinset underneath often needs grinding after.
- Laminate Flooring: Click lock laminate is the fastest removal on this list. Older glued laminate takes longer and can damage the subfloor if rushed.
- Vinyl Flooring: Sheet vinyl and vinyl tile installed before 1986 carry a real chance of asbestos in the backing or adhesive, which may require licensed abatement.
- Carpet: The least labor intensive job on this list, usually limited to pulling staples and tack strips from the subfloor.
- Subfloors: When water damage or structural sagging has compromised the plywood or OSB underneath, the subfloor itself becomes part of the demolition.
Preparing for Flooring Demolition
Preparing for Flooring Demolition starts well before any tool touches the floor. The first step is identifying the flooring age and material since that determines whether testing is needed. Homes built or renovated before 1980 warrant particular caution around vinyl and tile layers.
Furniture and appliances need to be cleared from the work area, and HVAC vents should be sealed to keep dust from spreading through the ductwork.
Shutting off water lines near washer hookups or dishwashers prevents an accidental flood mid demolition something that happens more often than most homeowners expect when a line gets nicked during flooring demolition.
Flooring Removal Checklist
A working Flooring Removal Checklist looks something like this:
- Confirm flooring material or age and whether asbestos testing is required
- Clear furniture, rugs and small appliances from the space
- Disconnect and cap any water lines running through the floor area
- Seal HVAC vents and doorways with plastic sheeting to contain dust
- Gather snoop bars and floor scrapers with a utility knife and a shop vac rated for fine debris
- Arrange debris disposal, whether that is a dumpster rental or a hauling service
- Confirm whether the subfloor will need repair once the old floor is gone
Skipping the testing step is the one that causes the most trouble later, since disturbing suspect material without confirmation can create an exposure risk that’s expensive to remediate after the fact.
Flooring Removal Process
The Flooring Removal Process generally moves in stages: containment, removal of the surface layer, removal of underlayment or adhesive residue, and finally subfloor inspection.
Rushing past any of these steps during flooring demolition is usually what turns a one day job into a three day job.
How to Remove Old Flooring
How to Remove Old Flooring depends heavily on what’s actually installed, but the general sequence for most jobs looks like this.
→ Pulling hooks as you go rather than leaving them in the subfloor for pinned hardwood work down each row.
→ Score the grout lines first for tile floor then use a chisel or demolition hammer to break individual tiles free before scraping the mortar bed flat.
→ Vinyl and laminate or engineered wood glued flooring is the slowest category because the adhesive has to come off the subfloor along with the surface material.
→ A heat gun or citrus based adhesive remover softens old glue enough to scrape it without gouging the plywood underneath which matters if you are planning to reuse that subfloor rather than replace it.
Safety Tips During Floor Removal
Dust masks rated N95 or better matter here, particularly with tile and older vinyl where silica dust and potential asbestos fibers are a real concern. Knee pads aren’t optional gear either.
Most floor removal happens at ground level, and a full day of kneeling on subfloor without protection leads to real joint strain. Keep a pry bar’s fulcrum point away from your other hand, since that’s the single most common injury during flooring demolition.
If testing confirms asbestos in tile, mastic, or sheet vinyl backing, stop and bring in a licensed abatement contractor rather than continuing on your own; the EPA is direct about the fact that disturbing that material without proper containment is what actually creates exposure risk, not the intact flooring itself.
Flooring Demolition Cost
Flooring Demolition Cost varies by material more than almost any other factor in a renovation, and understanding flooring demolition pricing before you sign a contract prevents surprises later. Based on current national contractor pricing, here’s what homeowners are typically looking at per square foot for labor:
| Flooring Type | Typical Removal Cost (per sq ft) | Notes |
|---|---|---|
| Carpet and pad | $0.50 to $1.50 | Fastest, cheapest removal category |
| Laminate | $2.00 to $3.00 | Click lock is faster than glued laminate |
| Sheet vinyl | $0.75 to $1.50 | Add $5 to $15 per sq ft if asbestos abatement is required |
| Ceramic or porcelain tile | $2.00 to $7.00 | Averages around $3.50 per sq ft |
| Hardwood | $2.00 to $4.00 | Averages around $3.50 per sq ft |
A normal 200 square foot room lands somewhere between $300 and $900 depending on material and a full first floor flooring demolition can run $2500 or higher once disposal and subfloor prep are factored in. Dumpster rental for debris generally runs $200 to $800 for the week depending on region and container size.
Factors That Affect Removal Costs
Age and adhesive type drive most of the variation in pricing on any flooring demolition job. A glued down floor with three layers underneath it costs significantly more to remove than a single layer of click lock laminate even if both rooms are the same square footage.
Stairs or tight hallways and furniture that cannot be easily relocated all add labor hours. Subfloor condition is the wildcard most homeowners don’t budget for. If the plywood underneath is water damaged or delaminating then repair or replacement adds $1 to $3 per square foot on top of removal.
DIY vs. Professional Flooring Demolition
Carpet, pad, and click lock laminate are reasonable DIY projects for a homeowner with a free weekend and a pry bar. Tile, glued hardwood, and anything installed before 1986 fall into a different category entirely.
Between the physical demand of chiseling out a mortar bed, the risk of damaging a subfloor you plan to reuse, and the possibility of disturbing asbestos containing material, professional flooring demolition often costs less in the long run than a DIY job that goes wrong. If you’re comparing your options, our guide on DIY Garage Demolition vs Hiring a Professional Contractor explains why hiring a professional is often the safer choice for demolition projects.
If you’re unsure which category your project falls into, that uncertainty itself is a reason to call a professional before picking up a pry bar.
What to Do After Removing Your Floors
This Floor Removal Guide wouldn’t be complete without covering what happens once the old material is out, because this stage is where a lot of projects either move forward smoothly or stall out for a week waiting on repairs nobody planned for.
Inspecting the Subfloor
Once the floor is stripped down then walk the entire subfloor looking for soft spots or separation between panels. Any noise underfoot usually means water damage or rot that needs to be cut out and replaced before new flooring goes down.
Check around plumbing fixtures and exterior walls first since those are the most common points of long term moisture intrusion.
Get Expert Flooring Demolition Services Today
Give us a call at Demo Pros Plus if you’d rather hand your flooring demolition off entirely. We handle everything from a single room tear out to a full house strip down, disposal included. Contact us at (714) 605-1651 to get a quote.
Frequently Asked Questions
1:How long does flooring demolition usually take?
A single average sized room typically takes half a day to a full day. Multiple layers, glued materials, or subfloor damage can stretch that to two or three days.
2: Can I remove flooring myself without any experience?
Carpet, pad, and click lock laminate are manageable for most homeowners. Tile, glued hardwood, and anything installed before the mid 1980s are better left to a professional given the physical demands and the possibility of asbestos containing material.
3: Do I require a permit to remove old flooring?
Most jurisdictions do not require a permit for flooring removal alone though if the project includes structural subfloor repair or is part of a larger renovation then check with your local building department before starting.
4: What happens to the old flooring debris?
Debris generally goes into a rented dumpster or is hauled away by the demolition contractor. Some materials like clean wood or metal trim can be recycled rather than landfilled depending on local facilities.
5: How do I know if my old flooring comprises asbestos?
Visual inspection alone is not reliable. If your home was built or last renovated before 1980 then have a sample tested by an accredited lab before disturbing tile and sheet vinyl or the adhesive underneath it.
Sources
- EPA guidance on identifying and safely handling asbestos containing building materials during home renovation.
- U.S. Environmental Protection Agency, “Construction and Demolition Debris: Material Specific Data”
- Homewyse and Angi contractor pricing data, 2026 – Industry cost estimates for flooring removal by material type, used as the basis for the cost ranges cited above.