
Summarize with
Demolition is often the most satisfying part of a home renovation. There is a certain thrill in tearing down the old to make room for the new. However, for most homeowners, a drywall demolition project involves much more than swinging a sledgehammer. This process requires careful planning, a strict focus on safety, and a clear understanding of what lies behind those flat, painted surfaces. Without the right preparation, you risk damaging your home’s structural integrity, ruining your flooring, or exposing your family to hazardous materials like lead or asbestos.
This guide serves as a comprehensive resource to help you move from the planning phase to a clean, empty space ready for reconstruction. You will learn how to identify potential hazards, manage your utilities, protect your belongings, and execute the teardown with professional efficiency. At Demo Pros Plus, we have seen many DIY projects go sideways because the homeowner skipped the prep work. This guide draws on years of field experience to ensure your project goes smoothly.
You can expect to learn about the following:
- Identifying and testing for hazardous materials.
- Distinguishing between load-bearing and non-load-bearing walls.
- Safely managing electrical and plumbing lines.
- Setting up professional-grade dust containment.
- Selecting the right tools for the job.
- Managing waste and debris disposal.
Preparation is not just about making the job easier; it is about making the job safe. When you approach demolition with a systematic plan, you reduce the risk of unexpected costs and injuries. Let’s get started with the foundational knowledge you need before the first piece of drywall comes down.
Understanding the Risks: Health and Safety First
Before you start swinging tools, you must know what your walls are made of and what might be hidden inside them. Older homes often contain materials that become dangerous once they turn into airborne dust.
Asbestos and Lead Paint
If your home was built before the late 1970s, it likely contains lead-based paint or asbestos. Asbestos was frequently used in joint compounds and ceiling textures (like popcorn ceilings) until it was largely banned. According to the Consumer Product Safety Commission, asbestos fibers pose a significant health risk when they are disturbed and inhaled.
Similarly, lead paint poses a severe threat, especially to children and pregnant women. Data from the Environmental Protection Agency indicates that even small amounts of lead dust can cause neurological damage. If you suspect these materials are present, you must have them tested by a professional before starting any demolition.
Silica Dust
Even in modern homes, drywall dust remains a respiratory irritant. It contains gypsum and often crystalline silica. Breathing in fine drywall dust can lead to throat irritation, coughing, and, over long periods, serious lung issues. Proper ventilation and personal protective equipment are not optional.
Key Takeaways: Health and Safety
- Test any home built before 1980 for lead and asbestos before starting work.
- Drywall dust is fine and invasive; it can damage your lungs and your HVAC system.
- Never assume a wall is “just drywall” until you have verified its age and composition.
Structural Assessment: Is That Wall Holding Up Your House?
One of the biggest mistakes a homeowner can make is removing a wall that provides structural support. Before you plan a demolition to create an “open concept” space, you must determine if a wall is load-bearing.
Load-Bearing vs. Non-Load-Bearing
A load-bearing wall supports the weight of the elements above it, such as the roof, the attic, or a second floor. A non-load-bearing wall, often called a partition wall, simply divides rooms and carries no weight other than its own.
To identify a load-bearing wall, look at the joists in your basement or attic. If the joists are perpendicular to the wall, the wall is likely load-bearing. If the joists run parallel, it might not be, though this is not a universal rule. Walls located directly above other walls in a multi-story home are also frequently load-bearing.
Expert Tip: If you are unsure about the structural status of a wall, hire a structural engineer for a one-hour consultation. It is a small price to pay to prevent your ceiling from sagging or collapsing.
Managing Utilities: The Hidden Dangers
Walls are the highways for your home’s infrastructure. They house electrical wires, plumbing pipes, gas lines, and HVAC ducts. Cutting into a wall without knowing what is inside can lead to floods, fires, or electrocution.
Electrical Lines
Most walls contain at least some electrical wiring. Even if there isn’t an outlet on the wall you are removing, wires might pass through it to reach another room. You should use a non-contact voltage tester to check for live wires behind the drywall.
Plumbing and Gas
Kitchen and bathroom walls are almost certain to contain pipes. However, drain lines and vent stacks can also run through interior walls far from any fixtures. Gas lines are particularly dangerous. If you smell gas or see yellow or black iron pipes, stop immediately and consult a professional.
HVAC Ducts
Large rectangular or circular metal ducts move air throughout your home. If a wall contains a return vent or a supply register, you will need to plan for rerouting these ducts, which often requires a specialized contractor.
| Utility Type | Potential Sign of Presence | Action Required |
| Electrical | Outlets, switches, or lights nearby | Shut off the breaker and test for voltage |
| Plumbing | Sinks, toilets, or showers on either side | Shut off the main water valve |
| Gas | Fireplaces or kitchen appliances nearby | Shut off the gas supply and call a pro |
| HVAC | Vents or registers on the wall | Plan for duct rerouting |
The Essential Toolkit for Drywall Demolition
You do not need expensive machinery for drywall demolition, but having the right hand tools will make the work faster and cleaner.
Necessary Hand Tools
- Sledgehammer (8lb or 10lb): For heavy impact, though often overkill for drywall.
- Drywall Hammer or Club Hammer: Better for controlled strikes.
- Reciprocating Saw (Sawzall): Useful for cutting through studs once the drywall is removed.
- Pry Bar (Crowbar): Essential for pulling boards away from studs and removing trim.
- Utility Knife: Used to score corners and prevent peeling paint on connecting walls.
- Screw Gun or Drill: To remove screws if you want to take the drywall down in large, clean sheets.
Cleanup Tools
- Heavy-Duty Contractor Bags: Regular trash bags will tear instantly.
- Push Broom and Dustpan: For large debris.
- Shop Vacuum with HEPA Filter: Standard shop vac filters will let fine drywall dust pass right back into the air.
- Magnetic Sweeper: To pick up dropped screws and nails that can puncture boots or tires.
Personal Protective Equipment (PPE)
Demolition is a high-risk activity for minor injuries that can be easily prevented with the right gear.
- Respirator: A simple paper mask is not enough. Use an N95 or, preferably, a P100 respirator to filter out fine gypsum and silica dust.
- Eye Protection: Wrap-around safety goggles are better than glasses, as dust can float behind the lenses.
- Work Boots: Heavy soles are required to protect against the hundreds of screws and nails that will end up on the floor.
- Gloves: Heavy-duty leather or synthetic work gloves protect against sharp metal beads and wooden splinters.
- Hard Hat: If you are removing a ceiling, a hard hat is a necessary safety measure against falling debris.
Expert Tip: Change your clothes and shower immediately after finishing for the day. This prevents you from tracking fine white dust into the “clean” areas of your home or your car.
Preparing the Space: Clearing and Protection
Demolition is incredibly messy. Drywall dust is like smoke; it will find its way into every crack and crevice of your home if you don’t seal the area properly.
Clearing the Room
Remove every piece of furniture, artwork, and clothing from the room. If an item cannot be moved, such as a large piano, wrap it entirely in plastic sheeting and seal the edges with tape. Remove window treatments and hardware as well.
Protecting the Floors
If you are not replacing the flooring, you must protect it. Cardboard or “Ram Board” is much better than plastic for floor protection. Plastic can be slippery when covered in dust and can easily tear under a ladder or heavy boots. Tape the edges of your floor protection to the baseboards to ensure no dust slips underneath.
Removing Trim and Fixtures
Before attacking the drywall, remove all baseboards, crown molding, and door casings. Use a pry bar and a small block of wood to avoid damaging the wood if you plan to reuse it. Also, remove outlet covers, switch plates, and light fixtures. Ensure the power is off before touching any electrical components.
Advanced Dust Containment Strategies
Standard plastic sheets hanging in a doorway are rarely enough. To truly protect the rest of your home, you need to create a sealed environment.
The Zip-Wall System
A Zip-Wall system uses spring-loaded poles to hold plastic sheeting tightly against the ceiling and walls without using tape that might peel your paint. This creates a temporary wall that keeps dust trapped in the work zone.
Creating Negative Air Pressure
If possible, set up a box fan in a window blowing outward. Seal the rest of the window with plastic. This creates negative pressure in the room, meaning air will be pulled into the work zone from the rest of the house, rather than dust blowing out into your living room.
HVAC Protection
One of the most expensive mistakes you can make is leaving your HVAC system running during demolition. Drywall dust will clog your filters, coat your ductwork, and can eventually burn out the blower motor. Turn off the system and seal all supply and return vents in the work area with plastic and tape.
Waste Management: Planning for Debris
Drywall is surprisingly heavy and bulky. A single 4×8 sheet of half-inch drywall weighs about 50 pounds. When you tear down an entire room, you will quickly find yourself with a mountain of debris.
Dumpster Rentals
For anything larger than a small bathroom, you will likely need a roll-off dumpster. According to data from the Environmental Protection Agency, construction and demolition (C&D) waste makes up a massive portion of the national waste stream. Renting a dumpster ensures that your debris is handled correctly.
Common dumpster sizes for residential demo include:
- 10-Yard Dumpster: Good for small bathrooms or kitchens.
- 20-Yard Dumpster: The standard size for most room demolitions.
- 30-Yard Dumpster: Necessary for whole-house gutting or large additions.
Disposal Regulations
Check your local municipal rules regarding C&D waste. Some landfills require you to separate drywall from other materials like wood or metal. In some regions, drywall can be recycled if it has not been painted or contaminated with lead.
Key Takeaways: Site Prep and Waste
- Floors need hard protection like Ram Board, not just thin plastic.
- Turn off the HVAC system to prevent expensive repairs to your furnace or AC.
- Plan for waste disposal before you start; the pile of debris will be larger than you think.
The Demolition Process: A Step-by-Step Guide
Once the room is prepped and the tools are ready, it is time to begin. Following a logical order will make the job safer and more manageable.
Step 1: Score the Perimeters
Use your utility knife to cut through the tape and paint at the corners where the wall you are removing meets the ceiling or adjacent walls. If you skip this, the drywall you want to keep might peel or crack when you pull the other wall down.
Step 2: The “Punch and Pull” Method
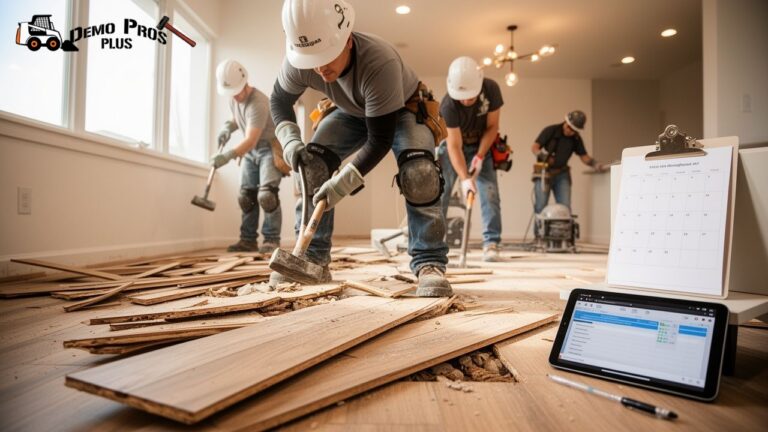
Do not start by swinging a sledgehammer at the middle of the wall. This creates unnecessary dust and can damage things behind the wall. Instead, find a spot between two studs and use a hammer to create a small hole. Once you have a hole, you can reach in (wearing gloves) and pull the drywall away from the studs in large chunks.
Step 3: Ceiling Removal
If you are removing the ceiling, always do this first. Use a pry bar to pull the drywall away from the joists. Be extremely careful of your footing on ladders, and watch for falling insulation. If your attic has blown-in cellulose insulation, be prepared for a massive mess as it falls.
Step 4: Removing the Studs (If Necessary)
If the wall is not load-bearing and you are removing it completely, you will need to take out the wooden studs. Use a reciprocating saw to cut the nails between the studs and the top and bottom plates. Then, pry the plates away from the floor and ceiling.
Expert Tip: Look for “hidden” fasteners. Sometimes, drywall is both glued and screwed to the studs. If it feels stuck, check for adhesive before prying too hard, as this can splinter the wood.
Handling Unexpected Discoveries
Even with the best preparation, you might find something unexpected once the walls are open.
- Mold: If you find black or green fuzzy growth on the back of the drywall or on the studs, stop. Mold requires specific remediation to prevent spreading spores throughout the house.
- Pest Infestations: Old nests, droppings, or chewed wires indicate a pest problem that needs to be addressed before you close the walls back up.
- Poor Past Workmanship: You might find “creative” plumbing or electrical work from previous owners. This is the perfect time to bring everything up to modern building codes.
Post-Demolition Cleanup
The job isn’t finished until the space is clean. Proper cleanup prevents dust from migrating later and prepares the surface for the next phase of construction.
- Bulk Debris: Remove all large pieces of drywall and wood and place them in the dumpster.
- Magnet Sweep: Run a magnetic sweeper over the entire floor multiple times. You will be amazed at how many screws are left behind.
- HEPA Vacuuming: Use a vacuum with a HEPA filter to suck up fine dust from the studs, floor tracks, and window sills.
- Wipe Down: Use a damp (not soaking wet) microfiber cloth to wipe down the remaining walls and the plastic barriers. This traps the final layer of fine dust.
Frequently Asked Questions About Drywall Demolition
Can I just use a sledgehammer for everything?
While a sledgehammer is effective, it is often too powerful for interior drywall. It creates more dust and is more likely to damage electrical wires or plumbing hidden in the wall. A smaller hammer and a pry bar offer more control.
How long does it take to demo a single room?
For a standard 12×12 room, a single person can usually complete the demolition and cleanup in one full day, provided they have a dumpster on-site and the room is already prepped.
Do I need a permit for drywall demolition?
Generally, you do not need a permit to remove drywall. However, if you are removing a wall (even a non-load-bearing one) or changing electrical and plumbing, most local jurisdictions will require a permit. Always check with your local building department first.
What should I do with the insulation?
Fiberglass batts can often be reused if they stay dry and intact. However, if the insulation is old, dusty, or has been home to pests, it is best to bag it and dispose of it. If you find vermiculite insulation, stop immediately, as it may contain asbestos.
Is it better to pull the screws or the drywall?
It is almost always faster to pull the drywall and let the screws stay in the studs. Once the drywall is gone, you can go back and pull the screws or hammer them in with a pry bar or hammer.
How do I prevent the dust from getting into my carpet in other rooms?
In addition to plastic barriers, you can place “sticky mats” at the exit of the work zone. These mats have an adhesive surface that pulls dust off the bottom of your boots as you walk across them.
Putting Your Drywall Demolition Strategy into Action
Success in demolition is found in the work you do before you ever touch the wall. By identifying structural concerns, locating utilities, and setting up a fortress of dust containment, you turn a chaotic process into a controlled one. This guide provides the framework, but the execution depends on your patience and attention to detail.
Remember that demolition is just the first step in your renovation. Doing it right means the people who come after you, whether it’s an electrician, a plumber, or yourself as you hang new drywall, will have a clean and safe environment to work in. Use this guide as a checklist for each phase of your project to ensure nothing is overlooked.
Need Expert Guidance?
If the scope of your project feels overwhelming or if you have discovered hazardous materials like asbestos or mold, it is time to call in the professionals. Demo Pros Plus specializes in safe, efficient residential demolition that protects your home and your health. Whether you need a single wall removed or a total interior gut, Mike and the team are ready to help. You can reach Demo Pros Plus at (714) 605-1651 or via email at mike@demoprosplus.com for a professional consultation.
Sources
- Consumer Product Safety Commission – A government guide on identifying and managing asbestos in the home.
- Environmental Protection Agency – Official resources for identifying lead-based paint hazards during renovation.
- Environmental Protection Agency – A fact sheet detailing construction and demolition waste statistics in the United States.
- National Fire Protection Association – The leading authority on electrical and fire safety standards for residential structures.